Thursday, February 24, 2011

Alabama stitching


I made my first Alabama Chanin - inspired project!
After posting last week about how much I love that layered, reverse appliquéd stitching, I found myself daydreaming about projects frequently at work.
In oogling at the DIY Studio Style page, I realized white and yellow (2 of the colors I had on hand) were a great color combination and I decided to make this over-arm pin cushion!
I know, of all the things to make...why a pin cushion?
I guess because it's small and simple like a sampler project to get a feel for this technique. And it's pretty and will make me want to camp out on the couch with my new pin cushion draped over the couch arm making more reverse appliquéd clothes :)

Here are my project specs:
7"x18.5" main body (2 white, 1 yellow)
7"x5" pocket (4 white, 2 yellow)
7"x 8" pin cushion (2 white, 1 yellow).
I cut everything and then stenciled the design with black ball point pen (not the best idea to use pen because it smears when handling while sewing. Usually, you use a spray paint, but the example pin cushion I was copying looked a lot like pen. The overall look is nice, but it'll probably get ruined if I ever wash (?) it.)
I cut my stencil out of synthetic felt for durability/longevity.
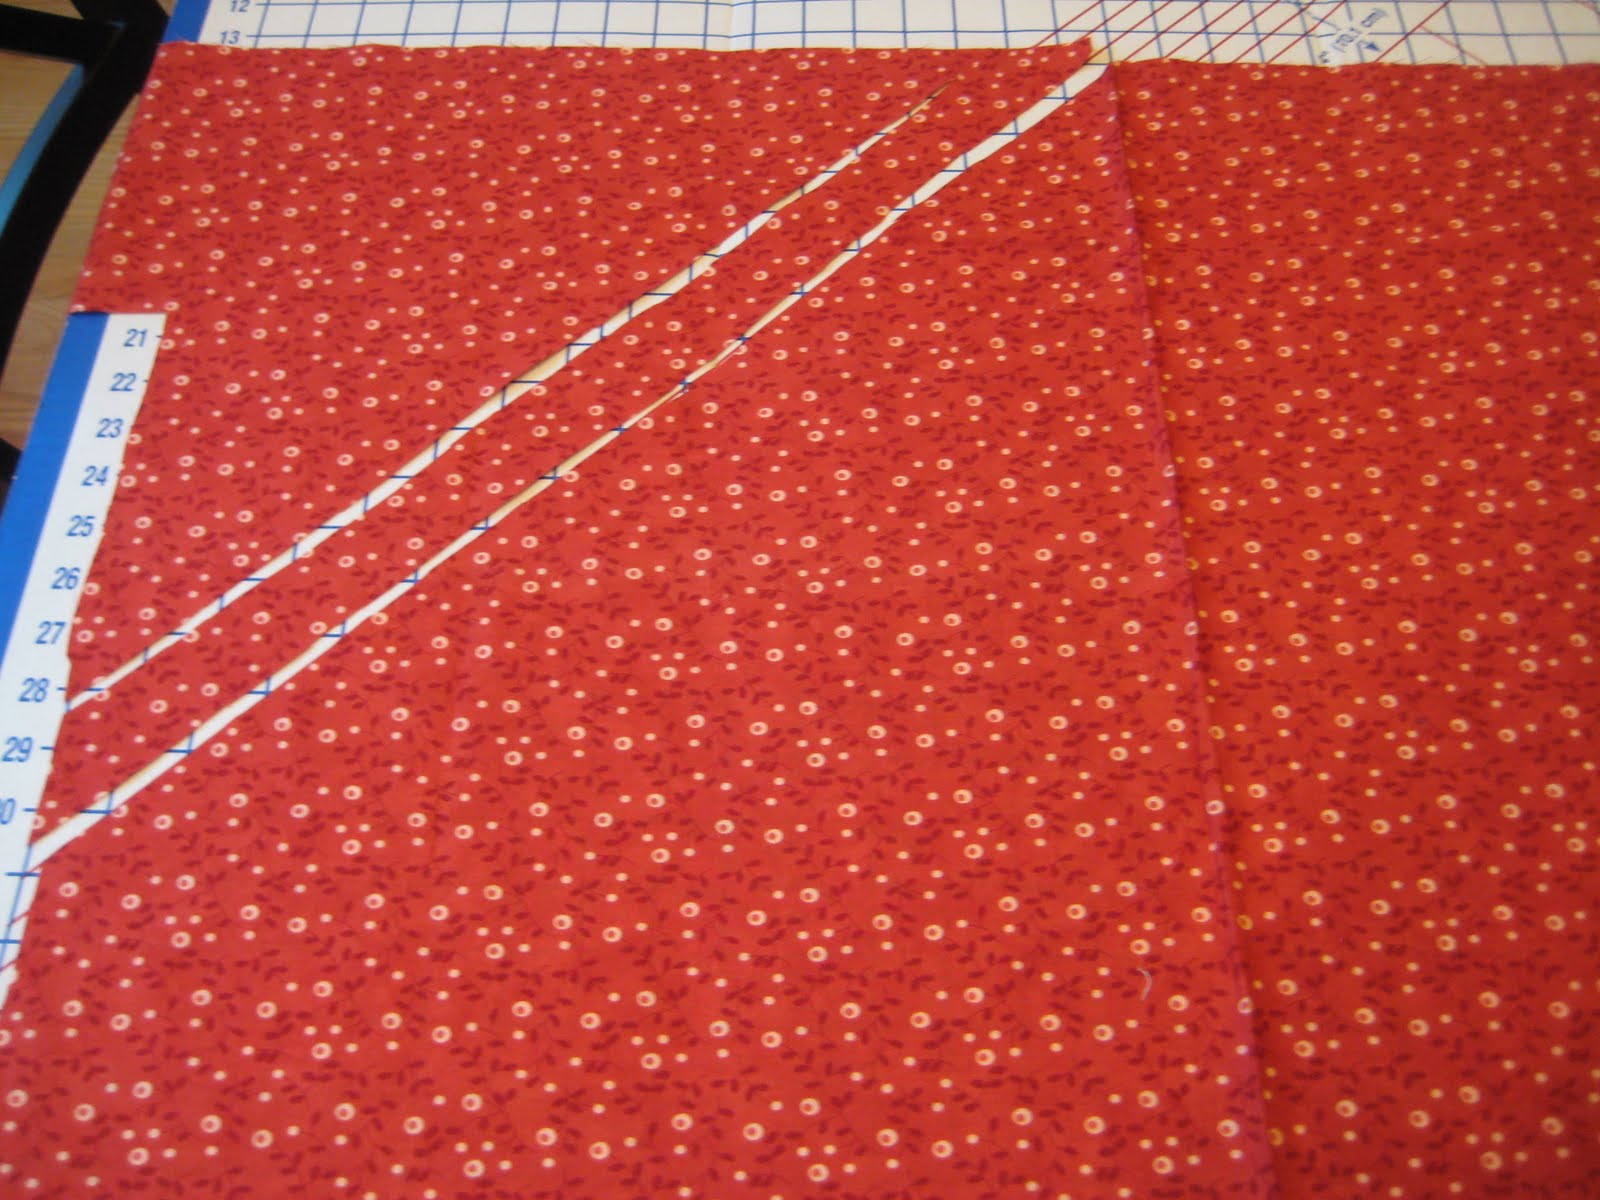
I sewed the pieces like so (above). In hindsight, it would have been smarter to stencil two large white rectangles to resemble the above pieces and eliminating extra seams. Unfortunately, I never plan my projects thoroughly enough to prevent oversights like this...
Now, sew the large rectangles together with right sides facing in, leave a small hole, turn right side out. Should look like this now: (with corners folded up)
Now for the stitching!
Use button/carpet thread (it's very thick) doubled and a long, but sturdy needle.
I started on the pin cushion using white thread, but found that it masked the pen outline. I switched to grey and found that it reinforced the pen marks giving a strong feel that I liked better.
The stitched and partially snipped pin cushion pieces. I like it!
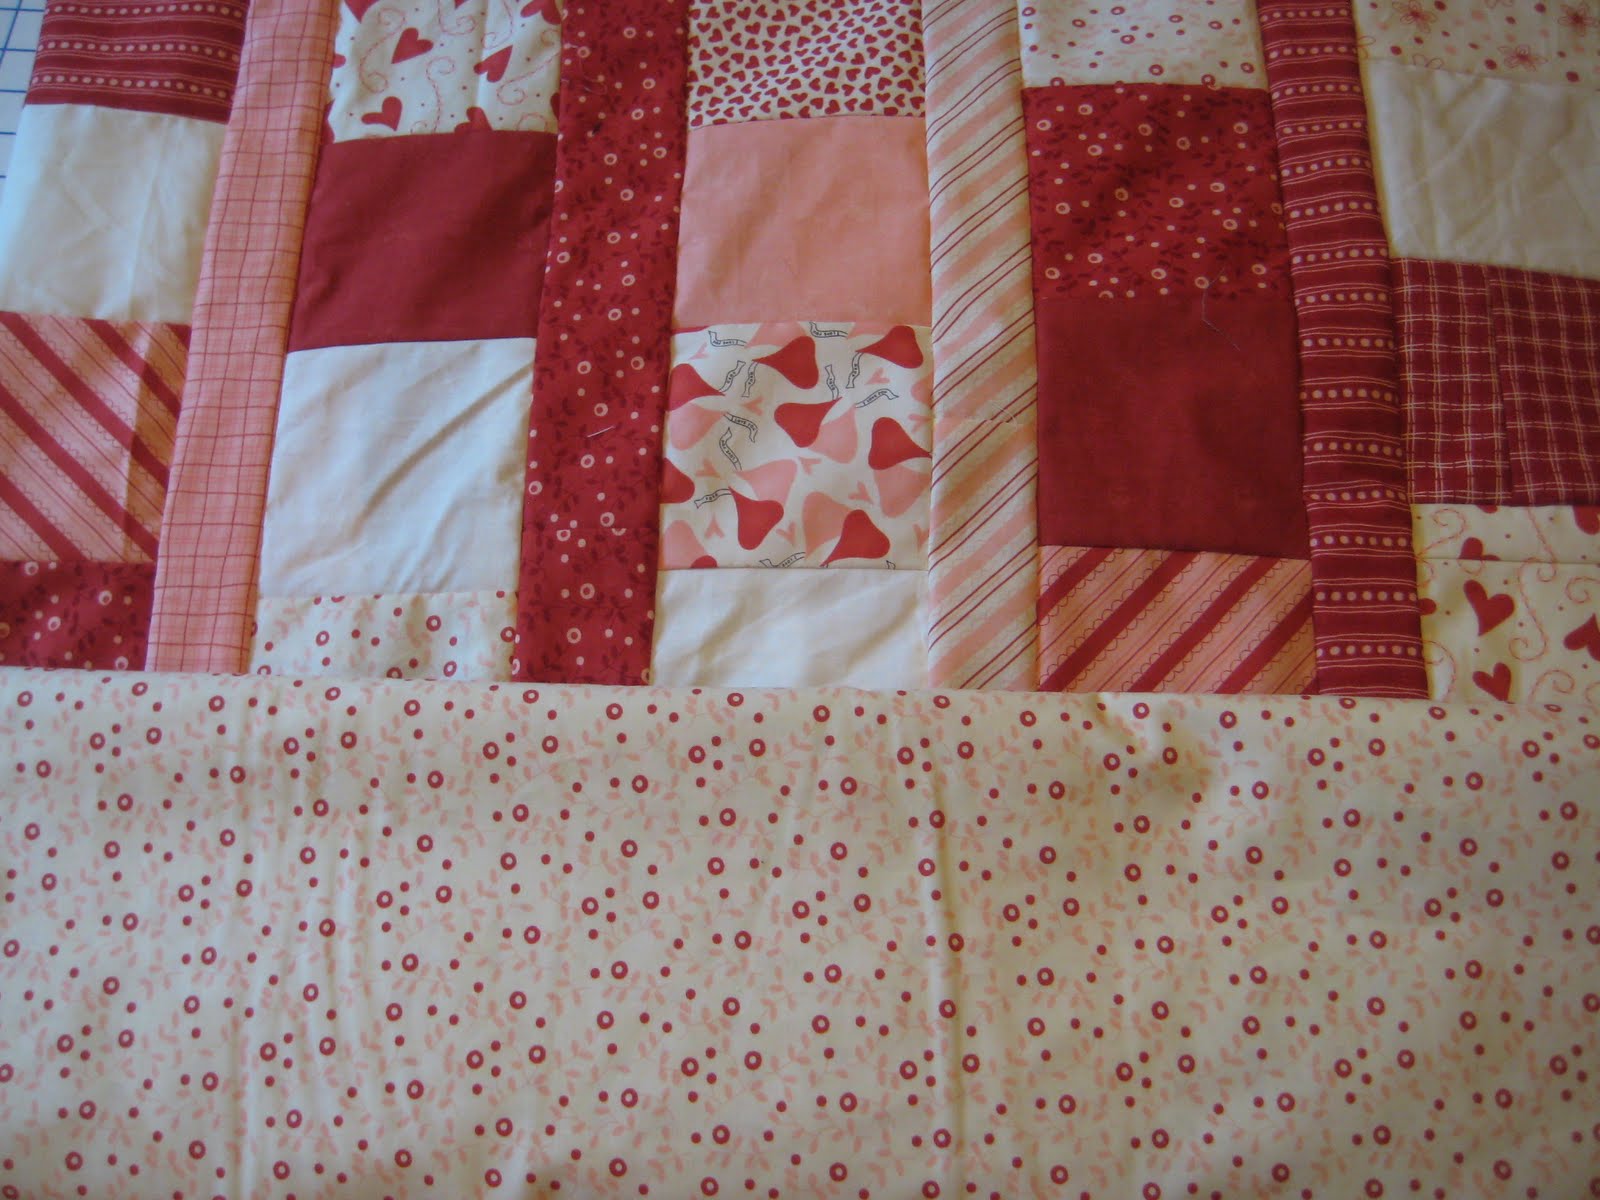
After trimming all the white spaces (above). You can see the slight difference between the grey (main body) and white (pin cushion) thread stitching.
Then, sew across the short edges of the main rectangle for stability, fold the pockets in place, and stitch them along the side edges.
Last, fill the pin cushion with rice and stitch in place.

Taa Daa!
This really is a beautiful way to recycle old shirts, thanks Natalie Chanin!

Wednesday, February 23, 2011

sewn hats


I sewed some hats for Adam.
They are all one piece, a rectangle about 22"x9." Then I added shaping in 6 sections (see below).

They turned out alright...not perfect, but they'll keep his head warm.

Tuesday, February 22, 2011

yikes!


In cleaning out the refrigerator yesterday, I realized why it's always so full and crowded:
Too many jars of sauce!

Monday, February 21, 2011

Happy Valentine's Day!


I know Valentine's Day was last week, but I finally finished the quilt I started in January which happens to be valentine-themed. (as you can see!)
Back at the Provo DI when I found that great cotton trim and various fabric scraps, I also got a stack of leftover quilt squares. Since I had never made a quilt, it seemed nice to have the squares ready to go. Plus they were all matching like they were from the same fabric collection.
It's different than how I imagined it would be (see explanation below) but I like it and I learned a lot of tricks that will make a second or third quilt less difficult.
To keep with the matching colors, I cut my own bias binding. like so:


I actually sewed this quilt top twice, once with 5"x5" squares arranged randomly and then with 2.5"x2.5" squares arranged diagonally by print. I put the whole thing together and had a few leftover squares so I cut each into 4 squares and made a "doll" quilt (I know it sounds silly, but I thought I might as well use the leftovers to make a matching doll quilt so when our future kids play house or whatever, they'll have a mini replicate of our real quilt).
Anyway, I liked the doll one better! It looked much better to have the prints organized since there were so many, and I liked the look of the smaller squares.
Doll quilt:

After deliberating back and forth for a few days, I decided to unpick the entire thing and re-cut and sew the squares! Unfortunately, to have enough fabric, I had to use the doll quilt to make the large quilt. I made another one, though! It's only about 1'x1' now - a doll's doll quilt.

*As often happens when buying someone's leftover craft supplies or unfinished craft projects, I ran into several obstacles when trying to complete this quilt.
1. limited supplies (I only had small amounts of each print, so I had to be very "skillful" in how I organized the pattern)
2. fabric from a few years ago with impossible to match colors (brick red, salmon pink, and off white were never so hard to match. Luckily, I found enough back stock of the same print collection, "Candy Kisses" by Sandy Gervais, at Prairie Point Junction online. I ordered enough for the quilt backing, binding, and a couple other prints to fill out the front)
3. inexperience. This was my first real quilt, and I naively thought it would look nice if the 15+ prints were arranged randomly. I laid out the squares, thought it looked awful, but sewed them all together anyway. A few days later, I finally gave in and unpicked the entire quilt! I cut the 5" X 5" squares into 2.5" X 2.5". I like it much, much better, but it took forever!
Before (I didn't take a full photo, because I didn't like how it turned out):

After:
4. precut squares - would have been easier as strips (sew strips together, cut crosswise into strips of squares, arrange in shifted pattern, see diagram below)

I'm glad it's finished!

Friday, February 11, 2011

Adam


This is Adam trying to be cute so he can get in more posts on my blog. I told him he was one of the most frequently used labels and when I showed him to prove it, he was happy but not satisfied to be second most frequent with "mushrooms" ahead by 5 points.
So he did a march - a house march, as we like to call it - wearing his new glasses and with silver coin in tow, hoping to make breaking news.
The only problem is, looking at this picture, he kind of looks like a mushroom :)

-Additionally, it's hard to post about his crypto-anarcho doings in cipherspace on my public, cute craft-oriented blog...

Thursday, February 10, 2011

Project Alabama


(Photo from Alabamachanin.com)
For ten years now I have been in love with Project Alabama, Natalie Chanin's amazing hand sewn clothes.
They are so beautiful. I can't get over each stitch, each bead, the colors, the stenciling, the whole thing - it's too much!
I remember back in 2001 or 2002 (in high school) I saw some of her Project Alabama stenciled and applique rooster shirts in a magazine and immediately wanted to make one.

I actually did make a shirt inspired by her designs, but it wasn't anything as lovely as what she had done. I used her technique of double layering cotton knits (in this case, a shirt), stitching a design (in this case, my name) and then cutting away the top layer. You can create a positive or negative image by cutting out the letters/shapes or cutting away everything but the letters/shapes.
Her company has moved from stenciled/applique shirts to stenciled/applique everything and I love it all! I love the combination of craft, skill, art, and time that each item exudes. She now has some particularly beautiful shirts, dresses, and skirts for ladies.
Here are some inspirational links you must see:
Alabama Chanin website
studio style, her DIY website where you can order kits or supplies
past collections
a Google image search
Her books: Alabama Stitch Book, and Alabama Studio Style
a project bag on Purl Bee
Anyway, about ten times so far I've almost started a real project, but put it aside for something else. This time I'm serious, and I'm blogging to prove it! I'm going to make a beautiful, double layer, applique skirt for myself (after I finish my first quilt that's almost done, Adam's "performance" fleece jacket, and some storage bags for our ice cramp-ons).
I've been collecting supplies for years now (old cotton knit pillow cases and sheets from DI, cotton knit shirts in cool colors, fabric spray paint, lovely stencil ideas that I traced and cut out of acrylic felt (to make them re-usable), I've already got lots of beads. I'm set as far as thrifted/recycled supplies go...just need to actually make something!

Tuesday, February 8, 2011

two snow shoe adventures


There have been 2 snowshoe adventures since Christmas 2010 when we bought each other snowshoes.
Check out this marvelous winter wonderland! It's amazing how beautiful 12 F degree weather can be!
Me gear!

My snow shoe guide.
Adam and I went on a snow shoe "date" 3 years ago (I invited him). I like playing in the snow, but I don't have a lot of experience since I grew up in southern California. Adam is much more adventurous than I and knows good tips like "run more if your toes are stinging." I like that he makes our outings more challenging.

Adam took this photo of slow, pregnant, me...way down there, barely hanging on (but happy, of course).
Snow stools! (like toadstools)
more photos:

Snow shoe trip number 2 was much warmer, luckily.

We walked up Denny Creek, passing under the I-90. It made for an interesting post-apocalyptic urban forest feel....
We went as far as the boy scout group ahead of us and then decided to ford the creek and climb up the steep snow bank using our ice axes, no big deal.
It actually really wasn't that bad. I had never used an ice axe before, so I didn't think we would make it up the snow bank, but after Adam showed me what to do with this wonderful tool, it was easy.
see? You jam it in to the snow, make sure it is solid, then pull yourself up using it like a handle.
We kicked steps up the bank and Adam taught me how to self belay as we climbed.

Once on the other side of the creek, we realized there was no way we'd make it past the lake and to the peak we had intended, so we hiked up a steep snow field and practiced glissade-ing (sliding on your bum, using an ice axe as a break).
Very graceful. Kind of difficult with snow shoes....

Then we walked over 5 miles back to the car in the dark. I was so tired, and somehow had a sprained/strained groin muscle...so I was lifting my leg with my hands for the last mile or so, hahahaha!
And then I forgot I was pregnant and took some ibuprofen.

Saturday, February 5, 2011

breakfast!


smoothie breakfast!
pink - banana, mango juice, apple, kiwi, raspberries
light green - banana, mango juice, apple, kiwi
yellow - banana, mango juice, apple
dark green - 2 leaves kale, 1/2 apple, 1 kiwi (so good!)

I didn't make them all separately...I made the kale one then made the "yellow" one, added kiwi to make "light green" and then added raspberries to make "pink."

I received these vintage juice glasses at my bridal shower from a friend in California. I love them - they are one of my favorite gifts (and they are one of the only gifts we have in our apartment, everything else went into storage until we have a house better suited for displaying cute things).

Wednesday, February 2, 2011

Spring?

I feel like it's spring.
I know it's not, but I feel like it is.
We're on our third day in a row of sunlight, the days are lighter and brighter, I can see mountains in every direction because there are no clouds, AND I've been eating fruit and tomatoes! Plus, I've been walking more because it's not raining and I've been stretching (just weak, 5 minute pregnant yoga stretching - but it's making a difference).

I love the fruits! We haven't been buying fruit very often because nearly every fruit is out of season and expensive, but I decided we should pay the $ and be happy!
My "spring" foods have included:
mango juice and yogurt to make "mango lassi"
kale smoothies (kale, banana, 3 kiwis, 1 orange)
honeydew melon!!!!
fresh apples and bananas all day
oranges and tangerines
tomato-lime salsa (roma tomatoes, onion, cilantro, lots of lime and lemon juice) in corn tacos :)
cracked oats for breakfast
homemade Swiss Muselix (rolled oats soaked in yogurt , orange juice, canned peaches, and frozen raspberries)
Oh, it's all so delicious I can barely stand it. I'm so happy it's "spring"!