Showing posts with label crochet. Show all posts

Friday, August 13, 2010

Bachelor's Button


As you may recall from this post, I have a collection of vintage handiwork magazines.
I want to spotlight one, "Edgings" from 1941, that I find particularly wonderful. It is full of knit and crochet lace edging patterns. Each one is inspired by and named after a plant or flower!
I am considering posting the pattern to several of the best ones.
Here is the Batchelor's Button:

I made a sample swatch of this edging in red (using 'fine' crochet thread with size 10 hook) and found it beautiful. I can't wait to find the perfect garment for this trim.....
Let me know if you make a swatch, I would love to see how it turns out and how you use it.

Wednesday, July 28, 2010

covered stones


I finally found some small, smooth stones to make the crochet covered stones I wrote about here.
I followed the "urchin" pattern from Resurrection Fern's tutorial and improvised another pattern. I used "fine" crochet thread and a size 10 hook.

I like how they turned out; they made a nice moving away gift for some of our friends.

Sunday, July 25, 2010

Resurrection Fern

One of my favorite sites to check is the Resurrection Fern.
She creates little micro-worlds and photographs them. Using leaves, flowers, seeds, ferns, rocks, snails, kitties, water (etc.) combined with handmade elements like embroidery, crochet, knitting, and sewing she makes beautiful collections of objects that have a common shape, texture, color...or just look good together. Anyway, hard to explain, just check out her site.
What I wanted to say about it today is that she has posted a tutorial at The Purl Bee on how to make her most recognizable - almost trademark - object: crochet covered stones.
They are so beautiful.
If you know how to crochet, it's very simple. You can follow any doily pattern or invent your own. Crochet it the size and shape of a particular smooth stone. Once it fits over the top of the stone, use a strong thread in matching color to crochet it to the stone by making progressively shorter crochet rows as you round the edge of the stone and work your way to the underside. Hard to explain in words, but check out her site and tutorial for more information and inspiration.
Happy crocheting!
I was excited to find this tutorial since I have recently gotten back into crochet, as posted here.
Oh, one time, for Christmas, I made my sister a crochet acorn holder necklace as per Resurrection Fern's inspiration! It is adorable and hilarious; Briana got a kick out of it!

Sunday, July 18, 2010

flying dove crochet bag


About a month ago I helped a friend sort through her deceased friend's old handiwork supplies. She was kind enough to offer me any of the supplies I wanted in exchange for the help and support going through the boxes.

I went home with a bundle of wool yarns and vintage crochet and tatting threads. Beside the wonderful colors and packaging labels, I love these threads for small crochet projects like bean balls/hacky sacs for kids, necklaces, flowers, etc...things I can do while riding the bus into Seattle for work.

I also came home with a stack of vintage patterns and pamphlets. These you already know I love....
After scouring the pages, I found 2 projects I wanted to start right away.
One is this cool leaf shirt and skirt. I think I will make the skirt narrower and lower waisted, and in green, of course.

The other is a mash-up project inspired by this lattice crochet corner hankie:
and this lattice crochet bag (via the House that Lars Built)

I didn't like how the dove looked in the hankie pattern, though I liked the dove idea. I drew up a pattern on graph paper and started to crochet the bag "by the seat of my pants" (Adam is convinced I do everything by the seat of my pants...)
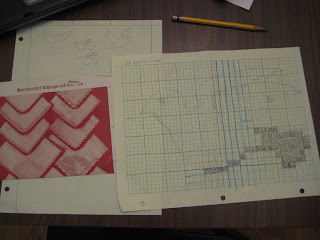
I was so anxious to begin the dove part that in hindsight I began it too early, resulting in the dove way down at the bottom of the bag. However, the most obvious problem here is that the dove doesn't even fit on one side of the bag...oops.

Also, in my unplanned haste, I failed to add some rounding to the bottom corners of the bag, so there are little points down there. I don't like how it looks at all. Adam's opinion of it is "Why did you make it all Grandma-y in pink?" Good point. my defense is that pink is the only color of which I had two balls and I didn't know how much it would take and didn't want to run out mid-project.

Anyway...before I even finished the first trial run, I started the second. I used orange thread and made the lattice squares 2X2 stitches instead of 3X3 stitches to give the bag more structure and prevent my items from falling out :)
I began the base with a few rows of single crochet stitches followed by a few rows of double crochet stitches to give the base more stability. I remembered to round the edges by increasing at the corners. So far it looks good; a little large, actually, but it will be a more useful bag that way, I suppose.

While making the first bag, I thought of all the fun things you can draw/write into your own graph paper pattern. I still like the dove, but I decided I also wanted to write Tree Peeps into the other side.
Updates to come!

Thursday, October 1, 2009

hand insurance

I need to insure my hands...I need hand insurance.
Everything I do relies on my hands and my "fine motor skills."
From writing, typing, scraping mildews, micropipetting, and working with small samples at work to sewing, knitting, drawing, gardening, cooking, canning, and blogging for fun.
Both my livelihood and my creative outlet rely on my hands.

I have a feeling I will be one of those old ladies with very knobby, well-used hands.

Hands, I would be lost without you!